How to Design Tech Stickers
I Feel Official Now
Nothing makes me feel cooler than having my own stickers.
I recently completed an iOS app together with three teammates. Justin is a sticker connoisseur. Jeff and Josh were excited for swag.
We researched some product ideas:
- Sweatshirts were too expensive.
- So were patches. (Yes! Patches!)
- Stickers are ubiquitous in the tech industry
So, stickers it was! It was well within our price range and we could do it locally. A local vendor was key because we wanted to inspect a proof, have face-time in the shop, and save time/money on shipping.
Here's a bit of what I learned, mixed with tutorial for how to create your very own tech sticker!
Lessons Learned
A Thought on Design
Creating a sticker is not as easy as creating a logo.
Creating a logo isn't easy either.
A logo lives in the digital world and can be manipulated by your code. It's generally a .png file with a transparent background but could also be an .svg.
Some of the hard work was done by the time we decided to make a sticker. I could use our .png logo as a start. Here's our splash screen:

When designing an app, I think about the total "theatrical" feel I want it to have. In college, I took a theater appreciation class which taught:
Everything on stage has an effect on the play: lighting, costume, make-up, sound, set. Everything can add or detract from the effectiveness.
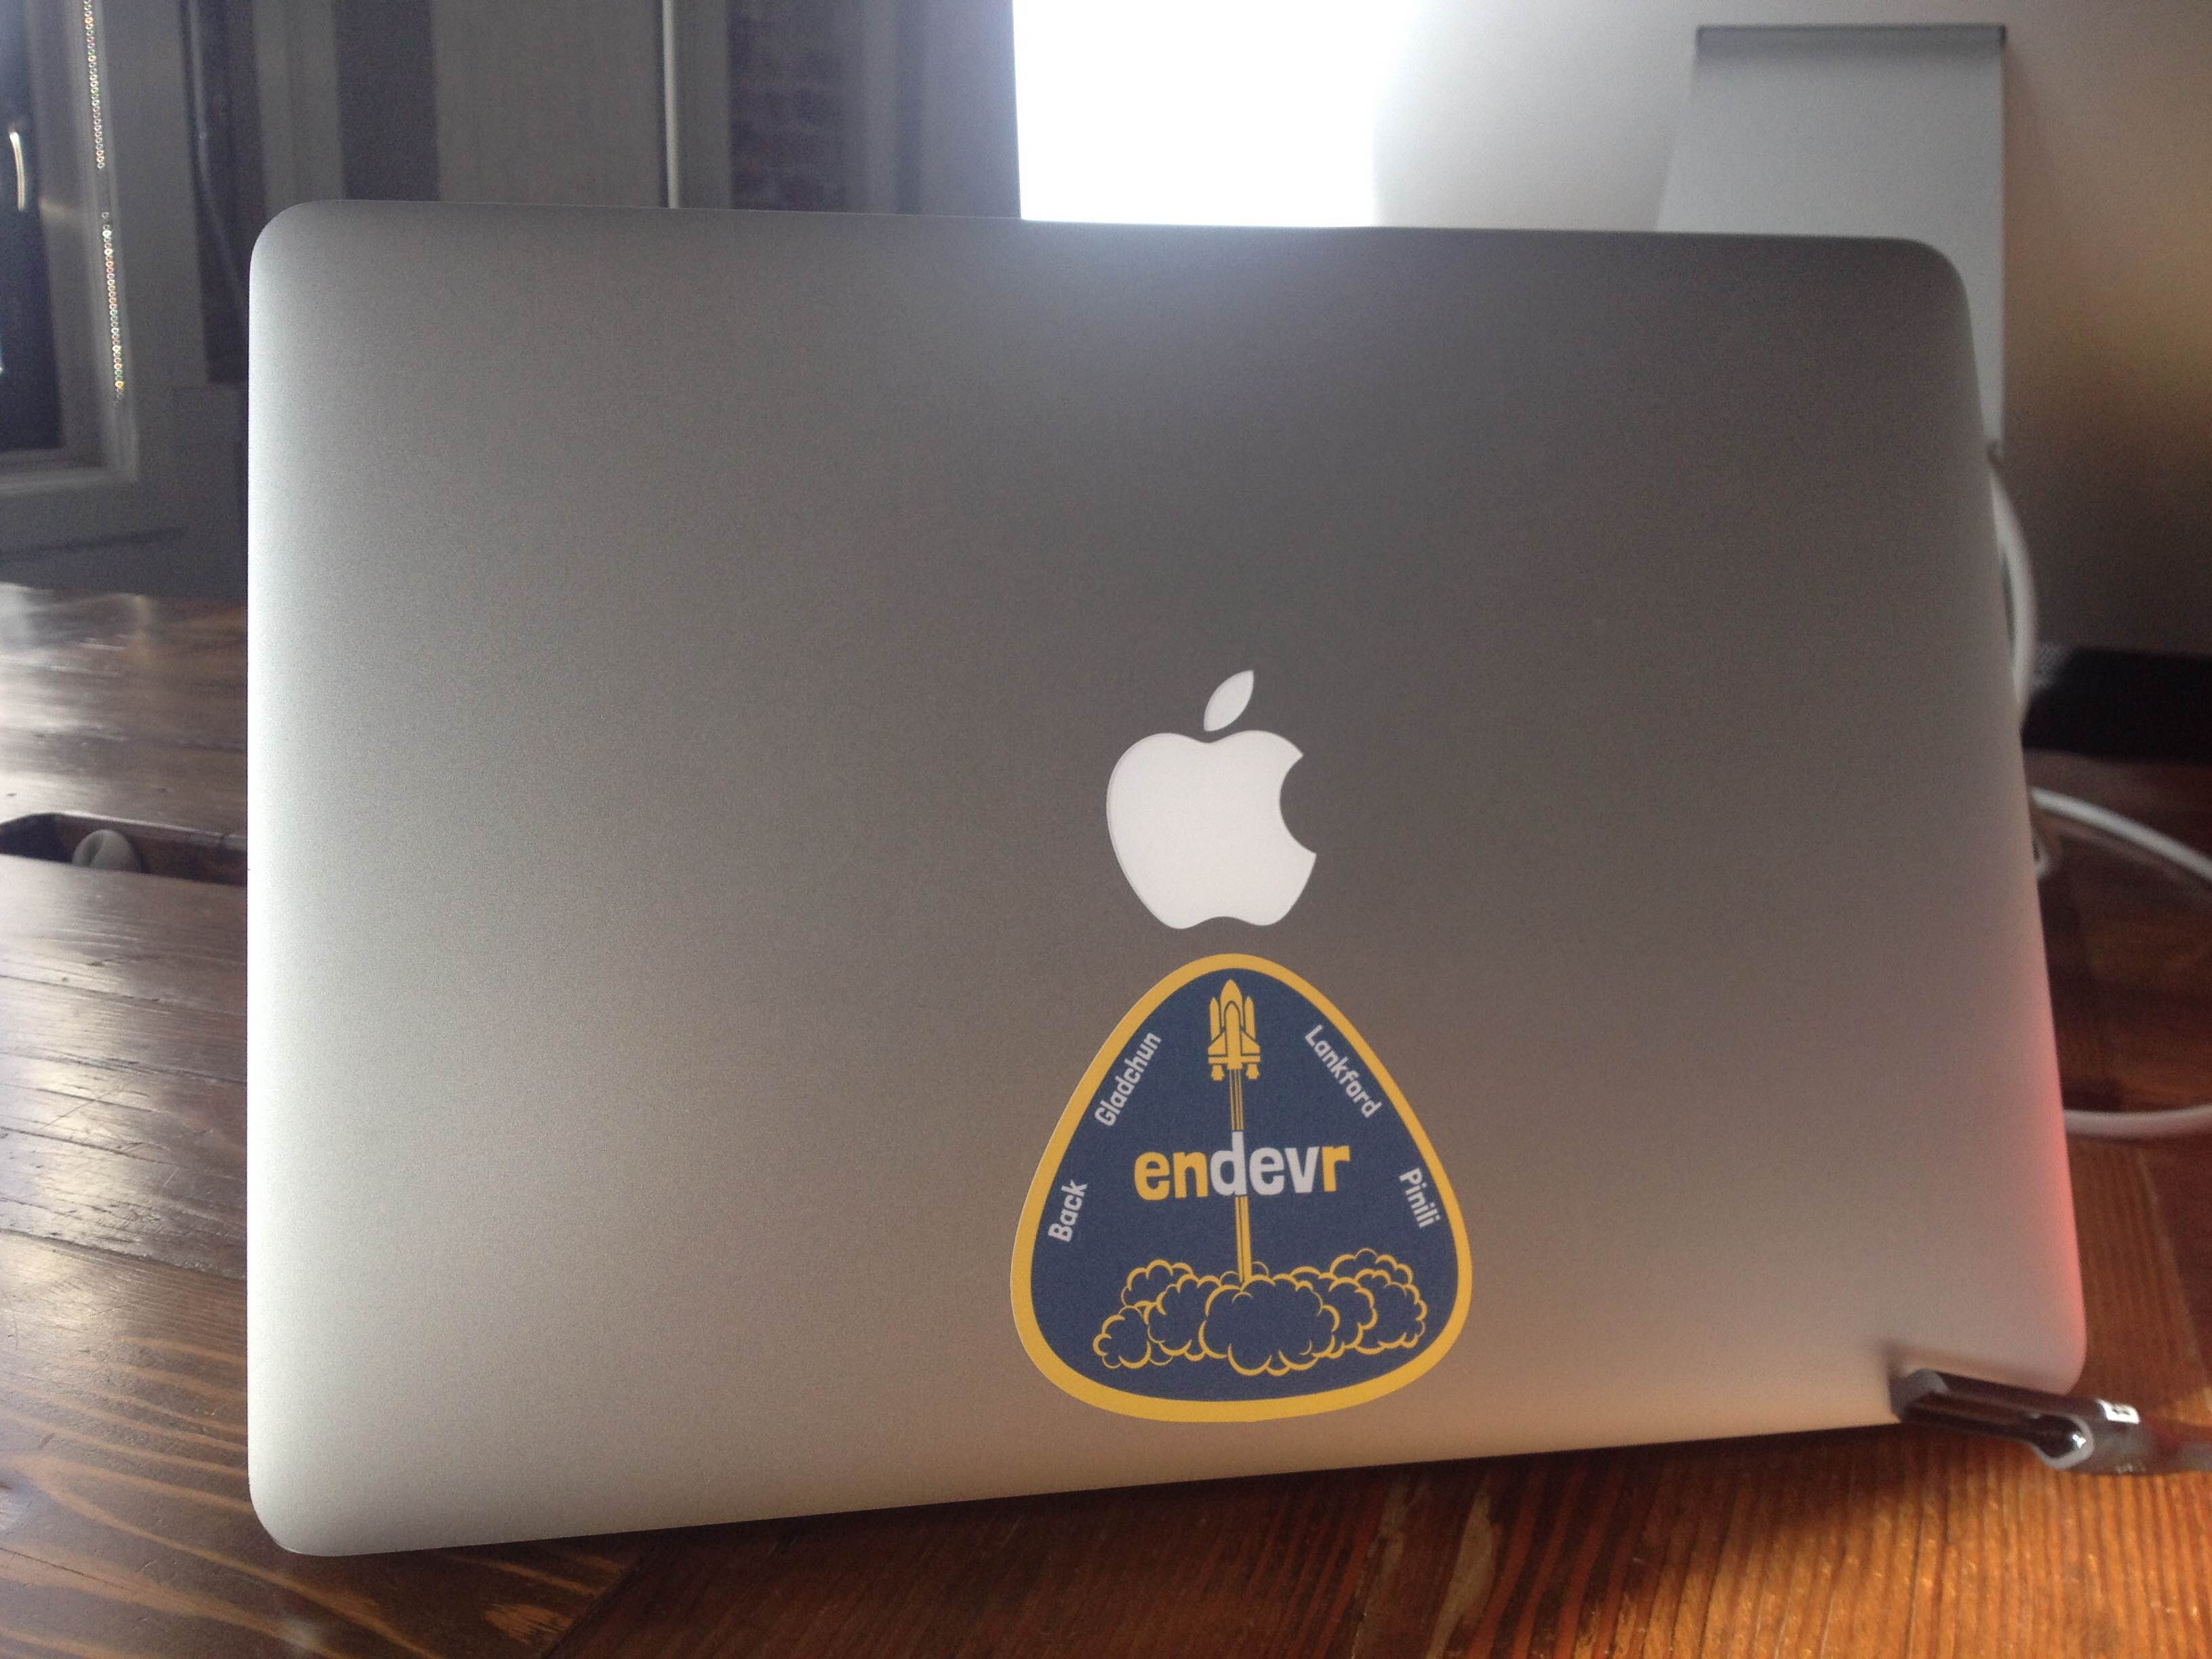
Endeavor. Space shuttle. Endevr. "Launch your career." Space. Rockets. Speed. Yellow is alive and quick.
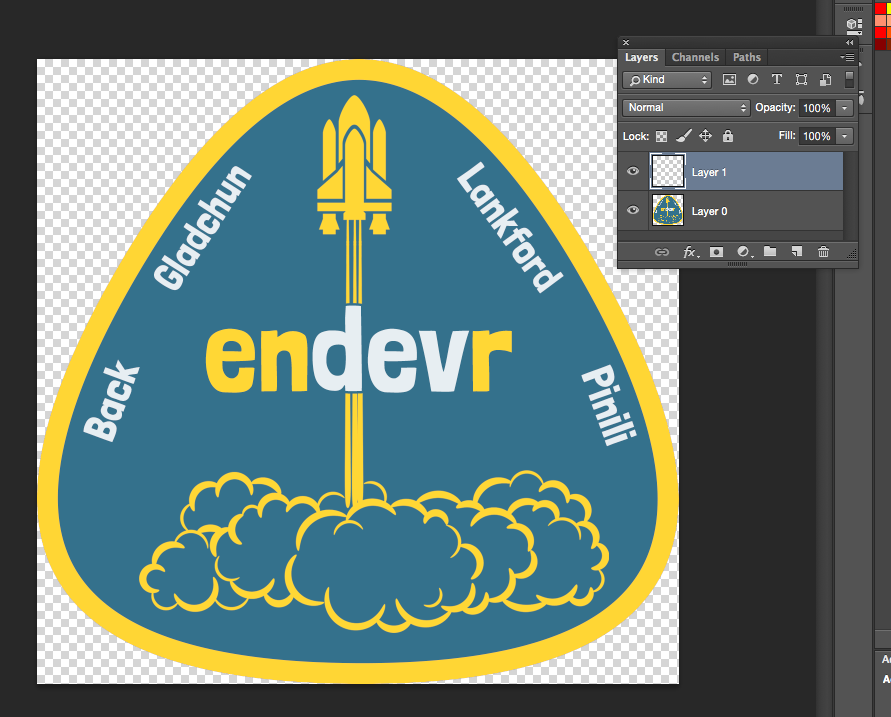
When it came time to design the sticker, we wanted an interesting shape which matched our theme. Since the entire app was built with space travel, I decided to make our sticker look like a space shuttle mission patch:

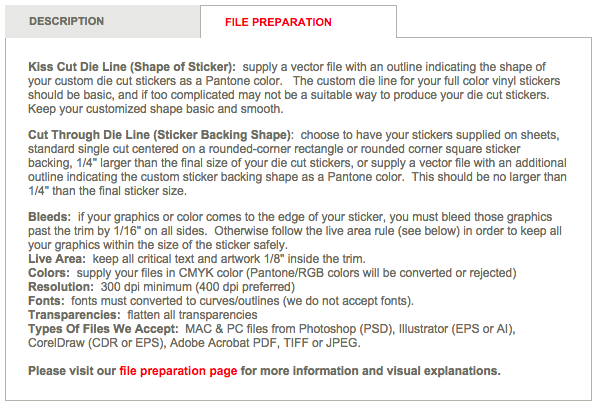
File Specs
Pick your print shop first so you know what your file specs need to be. Here are ours:
If you don't feel like dealing with any of this, most printers will do some graphic design for a fee.
This post is based on the file specs. I ordered them by when you're likely to encounter them in the design process.
Open up Photoshop or Illustrator and get at it!
Starting a New File
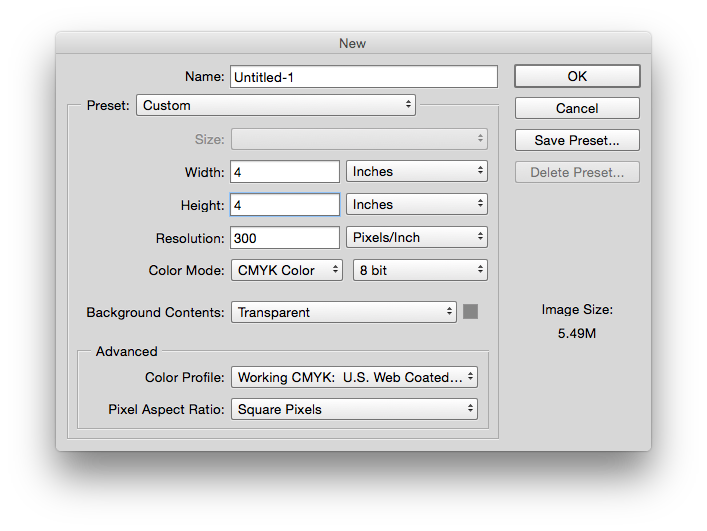 Size
Size
How big do you want your sticker to be? Change the units to inches and get out your ruler. Draw a mock-up. Bigger is probably better; you can always shrink but you can't expand (the quality will deteriorate).
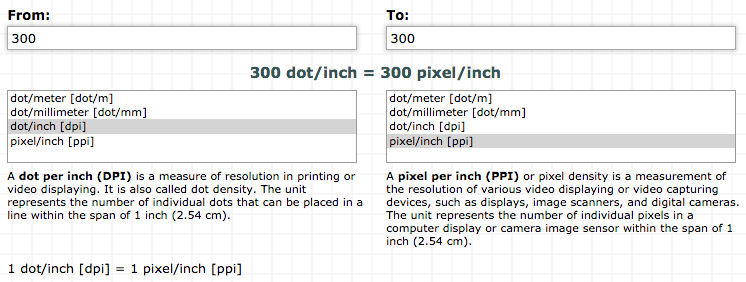
Resolution
Pixels per inch in Photoshop is not the same as dots per inch in printing. However, for the purposes of design, they are equatable:
CMYK
When you create a new file, make it in the CMYK color space. Default is generally RGB, but printers use cyan, magenta, yellow, and key (black) ink.
Bleeding and Live Area
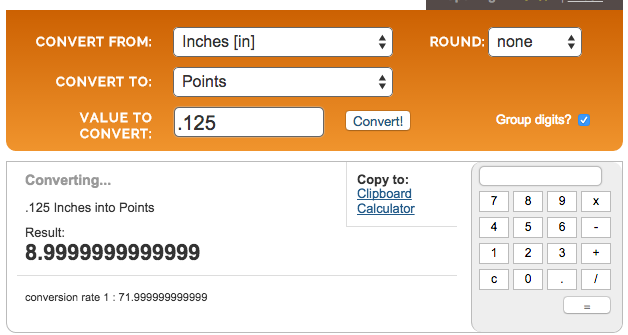
If your sticker has a border, make it thick. "Bleed it." I used this tool to figure out the thickness I needed to make my lines.
I want a 1/16th-inch border and need an 1/16-inch for the bleed, according to my printer. The total thickness is 2/16 or .125 inches. My line should be a 9pt thickness.
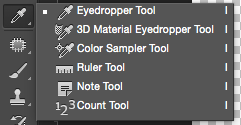
As for live area: don't put anything too close to the edge. If you've got a defined border, as above, put everything inside the border and you'll be fine. If not, user the ruler tool in Photoshop to make sure nothing's too close to the edge. It's hidden under the eyedropper on the left side menu.
Die Cut
Most stickers in tech are die cut. This means that the sticker is an irregular shape, not a circle, rectangle, or square.
While this aspect makes stickers unique, it also adds to the production costs. I also found this to be the most difficult part of production.
You have to draw a dieline which a computer will use to cut out your sticker into the correct shape.
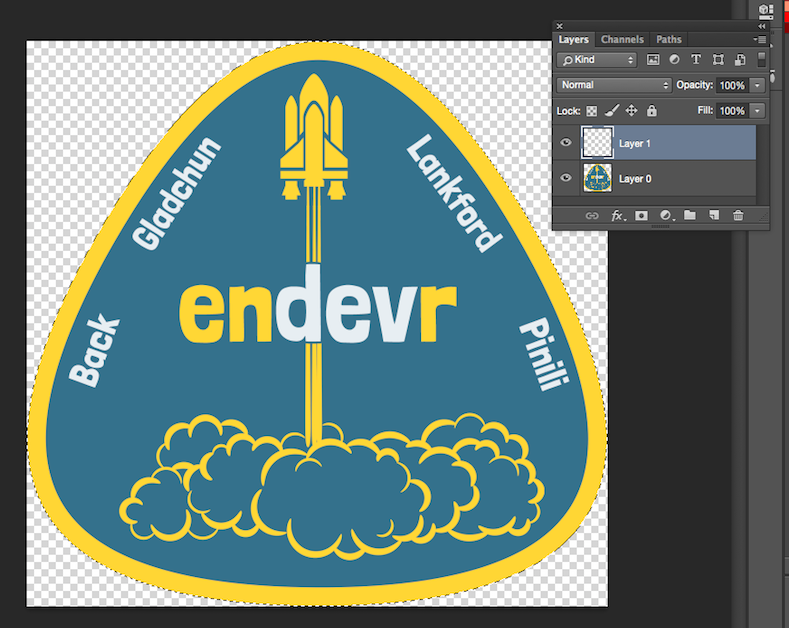
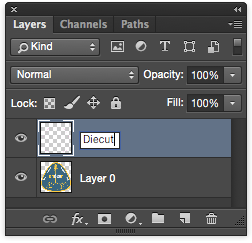
- Create a new layer above everything else. Keep it highlighted throughout the process.
- Command-Click on the tile left of your image layer. In the example, this is the tile to the left of Layer 0.
- In the menu, click Select>Modify>Expand/Contract.
If you made a border for bleeding, you'll want to contract.
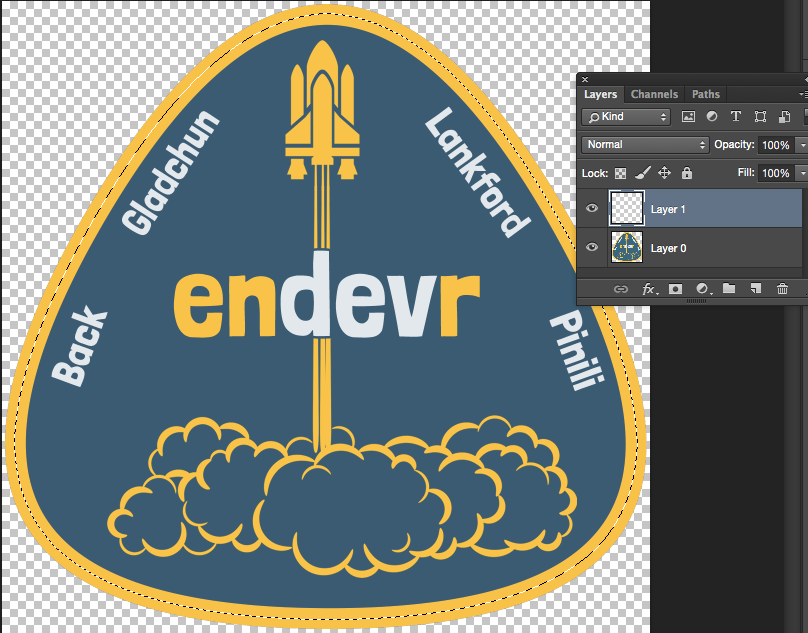
How much? It gets complicated. You have to calculate pixels-per-inch and consider your DPI. My DPI is 300. At this resolution, it's 38px. - Add a line which the computer will use to cut your sticker. Click Edit>Stroke. Make the color contrasty. Pixel size should be 2-3px. Type Command-D to deselect everything. Your image should look like this.
- Name the layer with your new line "Diecut" by double-clicking on the label text for Layer 1.

Thanks to Jake Gillispie for his tutorial on making a sticker from start-to-finish. I cannibalized the part on dielines for this post.
Formatting
Flatten the layers, except for the die line. This is how we left the example above.
I saved my sticker as a layered .tiff, but could have easily shipped as a Photoshop .psd. Check what format your printer wants and preserve the dieline layer.
Proofs
Don't be lazy or cheap. Order a proof and inspect it in-person. If the colors aren't right, say so. If it's too big, ask them to make it smaller. Double-check easy mistakes like spelling. (I almost spelled one of my teammate's names wrong.)
Display with Pride!
Order more than you think you'll need. Everyone will want one.
If you have any questions, feel free to comment below!
comments powered by Disqus